Showing posts with label Joann Crafts. Show all posts

Tuesday, December 30, 2014

Yarn Tassel Garland

Looking for a fun garland idea for your NYE party? How about making this super easy tassel garland, I made for my mantel. It's my twist on the popular tissue tassel garland, except this one won't be ruined if it accidentally gets wet. Speaking from experience here. ;) 
 Here is a list of the supplies you will need.

Extra thick or fluffyYarn (I found mine at Joann Crafts and Michaels Craft Store)
Scissors
Lace (Just another option)
Tape measure
First you will cut strips of the yarn and lace. I cute mine to about 14 inches. You can make yours as long or short as you'd like. To make mine extra fluffy I used 15 strips of yarn per tassel. 
Next you will just fold the strips in half.

 Then cut an extra piece to tie around the bundle. Then you end up with a tassel.


You can trim pieces as needed. I would make at least eight of these to make a tassel garland. Last step is to just string them together with a long piece of yarn. 
There are so many great yarn choices out there now, that you can really create some beautiful garlands. You can make one for NYE, a birthday party or shower, or a pink, red, and white one would be gorgeous for Valentines, which is just around the corner. I made several of these for gifts this year, they are just so fun!
Thanks for stopping by, hope you feel inspired to create a yarn garland of your own.
XO~Gretchen


Tuesday, December 2, 2014

How to make a vintage bottle brush ornament wreath

Hello everyone, can you even believe it's Christmas time? Our tree is up, and I am in total Christmas craft making mode. There is not enough time in the day to complete all the projects I have stored up in my brain. Well today is one of my favorite projects that I'll be sharing with you this holiday season, and it was inspired by my mom. Creativity runs in the family. You may have seen these gorgeous holiday wreaths, but often times they are priced really high, in fact I recently saw one priced at $225.Yowser! Here is the one that I created.

You can make one for a lot less by following these simple steps. First here is a list of the supplies you will need.

  • A wreath, this wreath my mom found at Joann Crafts
  • Ornaments, new or old
  • Glue gun
  • Vintage bits and pieces
  • Fingernail polish remover if you want to make ornaments look old


I started by placing the bigger ornaments and pieces around the wreath, so that they would be evenly distributed. I'm a kinda symmetrical girl. (wink)


Carefully glue them in to place using a low temp glue gun.
Then fill in the extra spaces with the smaller ornaments.


Want to make them look old and vintage? Simply use the fingernail polish remover and lightly wipe across them, and it will take the color finish off. Your new ornaments will now look vintage.
This project doesn't take much time. I finished it in about 45 mins. These are perfect to make as gifts for your vintage loving friends, or put one out on your table with your favorite candle as a centerpiece. I even think it would be lovely hanging on a mirror or door. You can find the video tutorial here

Thanks for stopping by, I hope you feel inspired to make one for yourself. Wishing you happy holiday, and be sure to stop by again soon, more Christmas projects are in the works. FALALALALALALAAA!
XO~Gretchen

Friday, October 24, 2014

Halloween Treat Jar

I can't believe next week is Halloween, this Fall is just flying by! Today I have an easy DIY project. You can learn how to make these cute little Halloween treat jars.
Here are the supplies you will need:
Round glass jar. I found at Joann's Craft Store
Small witch hat. I also found at Joanns
Candy of your choice. I used Halloween M&M's
Halloween embellishments. You can download clip art and print it
Crepe paper
Ribbon or twine
A tag. I found mine at Joanns
A sharpie
Glue gun
Glue sticks
Double sided tape
First you will decorate your witch hat. Grab some ric rack, or ribbon and glue it around the base of the hat. I used the pumpkin stickers and added folded crepe paper to the back. I then used the double sided tape to help secure the crepe paper. Then I added a little torn piece of book page.


Pick your favorite candy and treat. I chose the M&M's because I thought they were the perfect color and they are white chocolate, which is my fav. 
I found these metal tags also at Joanns, and you can write on them with a sharpie. It's the perfect way to  personalize your gift. 
I am already thinking how you could find a little black top hat, and make these into snowmen for the holidays. :) You could add little embellishments to the hat, and a scarf. For the video tutorial to this craft you can click here

Volia' the perfect little treat jar. You can give these out to your kids, grandkids, teachers, neighbors, or any special person in your life. Enjoy and thanks for stopping by!
XO~Gretchen

Monday, September 29, 2014

Light up BOO letters

I have another fun Halloween project for you today. I am going to show you how to create a light up BOO for your nest.
Here is a list of the supplies that you will need:
Cardboard letters (I found mine at Joann Craft Store)
Orange lights (Found at Michaels Craft Store)
Black paint
Paint brush
Plastic Spider (found at Michaels Craft Store)
String
Drill
Tape
Box cutter


The first step is to paint the letters. I painted them black, and decided to go with the traditional black and orange theme for Halloween.
It took two coats of the black paint.
After I allowed the paint to dry, I then cut the backs of the letters out. I did this so that it would be easier to poke the holes through, and I would have a place to hide the lights in the back.
Next, grab your drill to make the holes for the lights. I goofed and made my holes a little too big, however, I was able to fix it with a glue gun. I added a dab of glue around each hole so that the lights would sit securely. Problem solved, after sweating it out for 30 minutes ;)
Once you feed the lights into each hole, and make sure they sit securely in there, then you can put the extra lights and wires hidden in the back of each letter. I used 2 boxes of 50 count orange lights. The trick is to make sure that the letters sit really close together so that you don't see the string of lights in between.

I also added a spider's web to the middle O. I simply taped the twine on the back of the letter into a web pattern, and hung the spider.
There you have it! I created these same letters, on a much larger scale last year spelling out the word LOVE. You can find that blog post here
So here is what my Halloween mantel looks like with the light up BOO letters. 
A lot of the mantel decor I already had. I'm a big fan of using what you have, when you can. :) I purchased the banner last year at Target. They have some other great ones this year too, and if not then get out your cutting machine and make up your own! I used my handy dandy chalkboard. The inspiration for the drawing came from here.
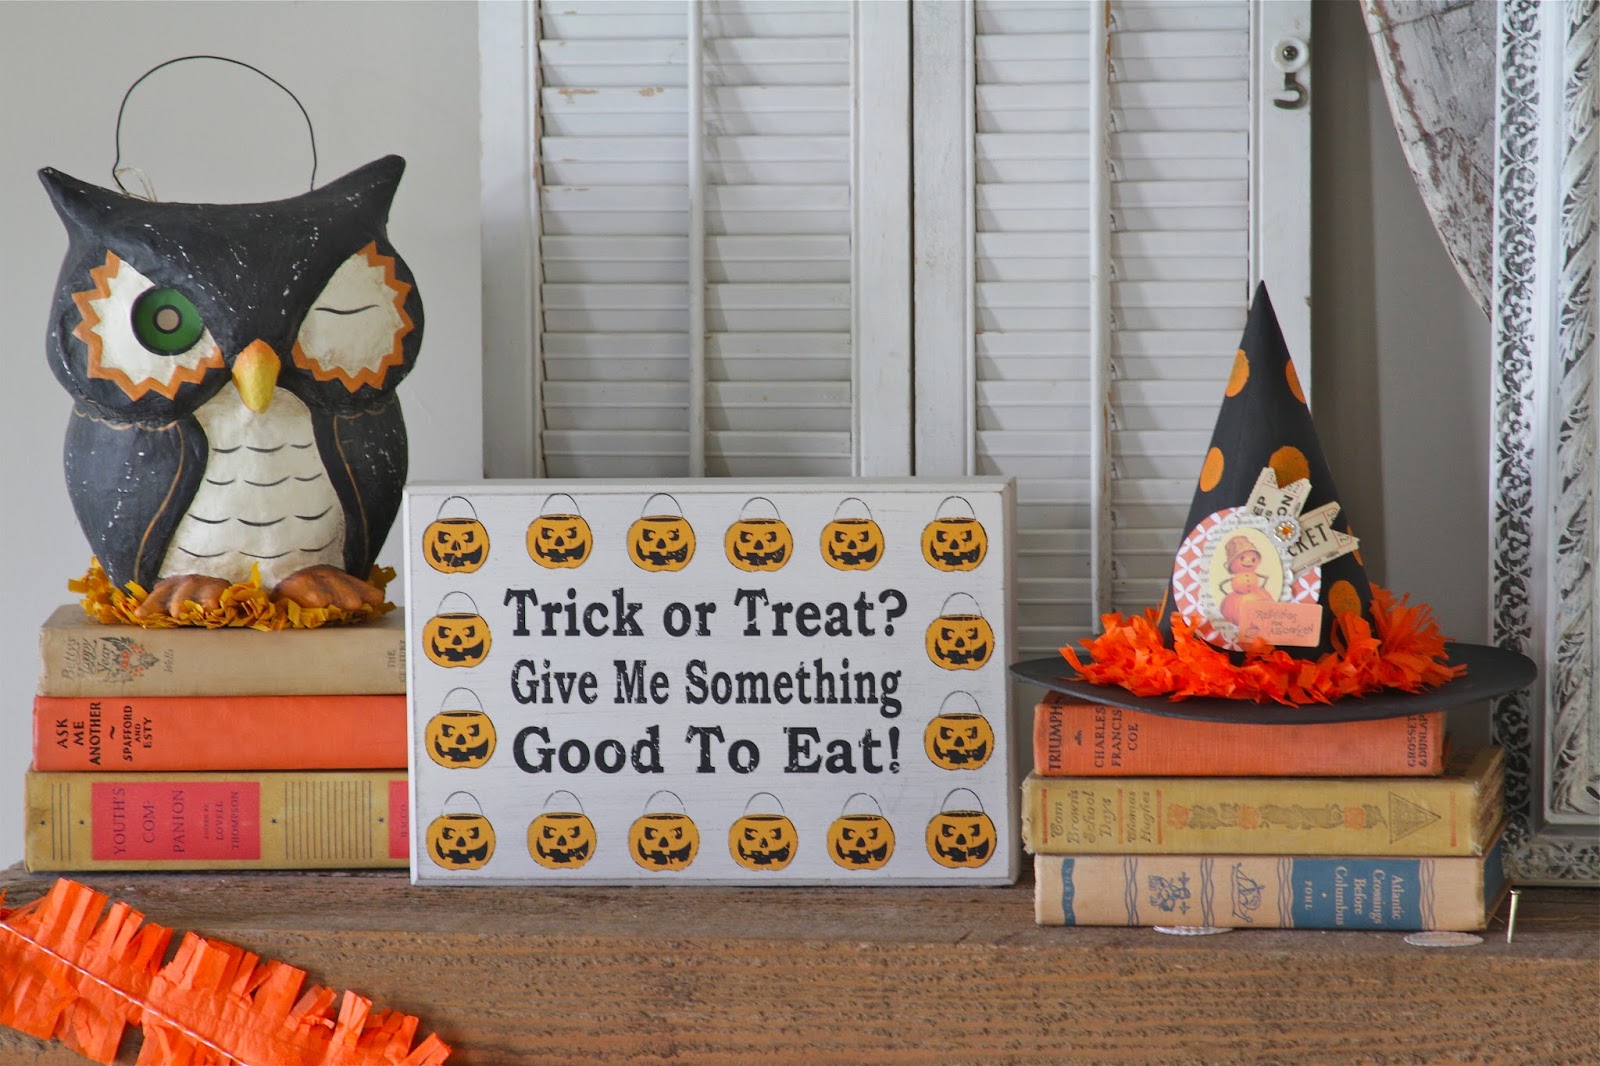
I used some of my old vintage books that I collect to add some height. The owl and the trick or treat sign came from good ol' TJ Maxx a few years back. I made the cut out pumpkin with my Cameo Silhouette. Here is the pattern.
I added the yarn pom poms to my banner. The shutters I've have, and they worked out to be a great place to hang some spooky spiders from. And lastly, I made the witches hat, and I have an easy tutorial coming soon, so you can make one too!


There you have it! Hope you feel inspired to add a little Halloween to your nest. Thanks for stopping by.
Until next time...
XO~Gretchen

Tuesday, March 25, 2014

Easy DIY Beach Bag

Since the beginning of the year I have been sewing a bit more. I even learned how to sew in a zipper properly thanks to my friend Melissa over at the Polka Dot Chair. She and I got together last week and made the cutest polka dot purses. I'll blog the details soon. So since Spring Break is fast approaching, and Summer will hopefully find it's way to us, I thought I would make a fun and easy beach bag.
Supplies you will need:
3/4 yard of material of your choice
Thread
Sewing machine
Cording
Scissors
Tape measure

So the first thing I did was choose my material. I feel in love with this kelly green eyelet material that I got on sale at Joann Fabric and Craft Store. I thought it would be perfect because the material was light weight, and since there are holes in the fabric it would be easy to shake the sand out of it! They also happened to have the perfect color cording to match. It was a win, win.
I folded the top of the fabric first, making a 1 inch hem along the top of the bag.
Once both of the top sides were finished, I folded the material in half, and began sewing up the sides. I wanted the bag to have rounded corners, so I rounded the corners as I was sewing along.
Once you round the corners of the bottom of the bag, be sure you turn the bag inside out, and cut little triangles in it like this....
This will help the rounded corners lay better, and you won't have the excess fabric. This also works for just regular straight corners. You should always cut the excess fabric. 
So now all three sides are sewn up, and the top is open. You will then need to add the handles. This is were I used the matching green cording that I had found. You could also sew straps out of the fabric you are using.
I found the middle and then spaced the handles about 5 inches out.

I pinched the cording in the fabric and sewed it in. I wanted to make sure that it was extra secure, so I also hand stitched it too, just to make sure that the cord did not slip out.
This bag is super easy to make, and I am looking forward to using it all Spring and Summer long. Kelly green is fast becoming one of my new favorite colors. It's so bright and cheery.
I was able to fit 4 large beach towels in the bag, plus some sunscreen, so it's a pretty large bag. I love how light weight it feels because of the fabric.


Hopefully you have something fun planned for your Spring Break, or Summer vacay. Try making one of these beach bags, I think you will find it super easy to make. Thanks for stopping by, until next time.
XO~Gretchen

Thursday, August 15, 2013

Back to School Mantel

BACK TO SCHOOL
It's back to school time at our house. All my boys start back next week. I can't believe summer break is nearing an end. :( I really enjoy having my boys home for the summer. We have enjoyed lots of family time together. Since it's the start of a new school year I decided to create a mantel to celebrate my boys and encourage them to have a wonderful school year. I created this design using some things I had, and a few things that I purchased.
First I created the banner using my cutting machine. I then found this adorable ruler ribbon for $.99 at Hobby Lobby. You get six feet on the roll, which is a great deal. I picked up the tiny clips a while back, and think they worked out perfect to hold the cards. 
Close up of the details. I love the polka dot paper. I found this paper at Michaels Craft Store.

I found the writing tab slips from Michaels, they were 50% off and ended up being $.50 They came in a pack. I wrote each of my boys names on them for a personal touch.

I made this large "B" out of a cardboard B that I found at Joann Crafts. I covered it with some material that I had, and then outlined the letter with twine.
The large globe is a vintage find, I love it! I found this other metal globe at Target. I stacked the smaller globe on vintage books that I've had for a while.
This is an old frame that I painted aqua, shocking I know ;). I made these little banners to hang on it. I used some apple print scrapbook paper for the triangle banner. The other one is made out of alphabet stickers I found for cheap at Michaels Craft Store. I also found the grade stickers there. Those are the grades that my boys will be in this year. Just another way to add a personal touch. 


I found these addition cards in the dollar section at Target. I had these letter stickers and used them to spell out A,B,C. I also used this vintage frame that I painted aqua.
I am not a chalkboard artist by any means, but this is the special message I wanted to share with my boys. I hope you feel inspired to create a back to school mantel. Best wishes for a wonderful school year, and if you are a teacher then thank you in advance for all your hard work and dedication! 
XO~Gretchen