Showing posts with label cameo silhouette. Show all posts

Tuesday, December 9, 2014

OH Deer

As promised here is the post about the recent deer artwork that I made for our mantel. It is really an easy piece to make, and you can size it accordingly. Maybe make one for yourself and one as a gift, because faux deer heads are all the rave right now. :)

So here are the supplies that you will need:
  • A canvas, you can choose the size. Or I used scrap boards and painted them white, and had my husband attach them together from the back.
  • Pencil to sketch out your deer head
  • Paint color of your choice
  • Scrapbook paper
  • I used my Silhouette Cameo to cut out the flower shapes and the Joyeux Noel. I use my machine often, it really comes in handy. Maybe if you don't' have one, you can ask Santa ;)
  • Paint brushes
  • Glue and double sided tape

I painted my boards white, if you are using a canvas, this is not necessary. Then I sketched a deer head on the board. I did this free handed, with a pencil and eraser. Feel free to look for a downloadable stencil if you do not feel comfortable just drawing by hand. Silhouette has some great designs to download. 
Once I felt like I had all my proportions correct, I then painted my deer gray. Feel free to paint your deer, whatever color will work with your decor.

Next I used my silhouette cameo to cut out the words Joyeux Noel. You can find that design here.
 I used good old Elmers glue to glue it to my board. Next I used my cameo again to cut out flowers in various colors. You can find that here. It made it so easy to cut and assemble the flowers, and I love paper flowers, you can get really creative with your colors, and they never need to be watered. ;)
 I used double sided tape to assemble the flowers into a crown on the head of the deer. It was really simple to do. And there you have it! My artwork is displayed on a mantel in our master bedroom. I really love the whimsy it adds.
Hope you feel inspired to make one for yourself. Happy Holidays, see you back here soon.
XO~Gretchen

Monday, September 29, 2014

Light up BOO letters

I have another fun Halloween project for you today. I am going to show you how to create a light up BOO for your nest.
Here is a list of the supplies that you will need:
Cardboard letters (I found mine at Joann Craft Store)
Orange lights (Found at Michaels Craft Store)
Black paint
Paint brush
Plastic Spider (found at Michaels Craft Store)
String
Drill
Tape
Box cutter


The first step is to paint the letters. I painted them black, and decided to go with the traditional black and orange theme for Halloween.
It took two coats of the black paint.
After I allowed the paint to dry, I then cut the backs of the letters out. I did this so that it would be easier to poke the holes through, and I would have a place to hide the lights in the back.
Next, grab your drill to make the holes for the lights. I goofed and made my holes a little too big, however, I was able to fix it with a glue gun. I added a dab of glue around each hole so that the lights would sit securely. Problem solved, after sweating it out for 30 minutes ;)
Once you feed the lights into each hole, and make sure they sit securely in there, then you can put the extra lights and wires hidden in the back of each letter. I used 2 boxes of 50 count orange lights. The trick is to make sure that the letters sit really close together so that you don't see the string of lights in between.

I also added a spider's web to the middle O. I simply taped the twine on the back of the letter into a web pattern, and hung the spider.
There you have it! I created these same letters, on a much larger scale last year spelling out the word LOVE. You can find that blog post here
So here is what my Halloween mantel looks like with the light up BOO letters. 
A lot of the mantel decor I already had. I'm a big fan of using what you have, when you can. :) I purchased the banner last year at Target. They have some other great ones this year too, and if not then get out your cutting machine and make up your own! I used my handy dandy chalkboard. The inspiration for the drawing came from here.
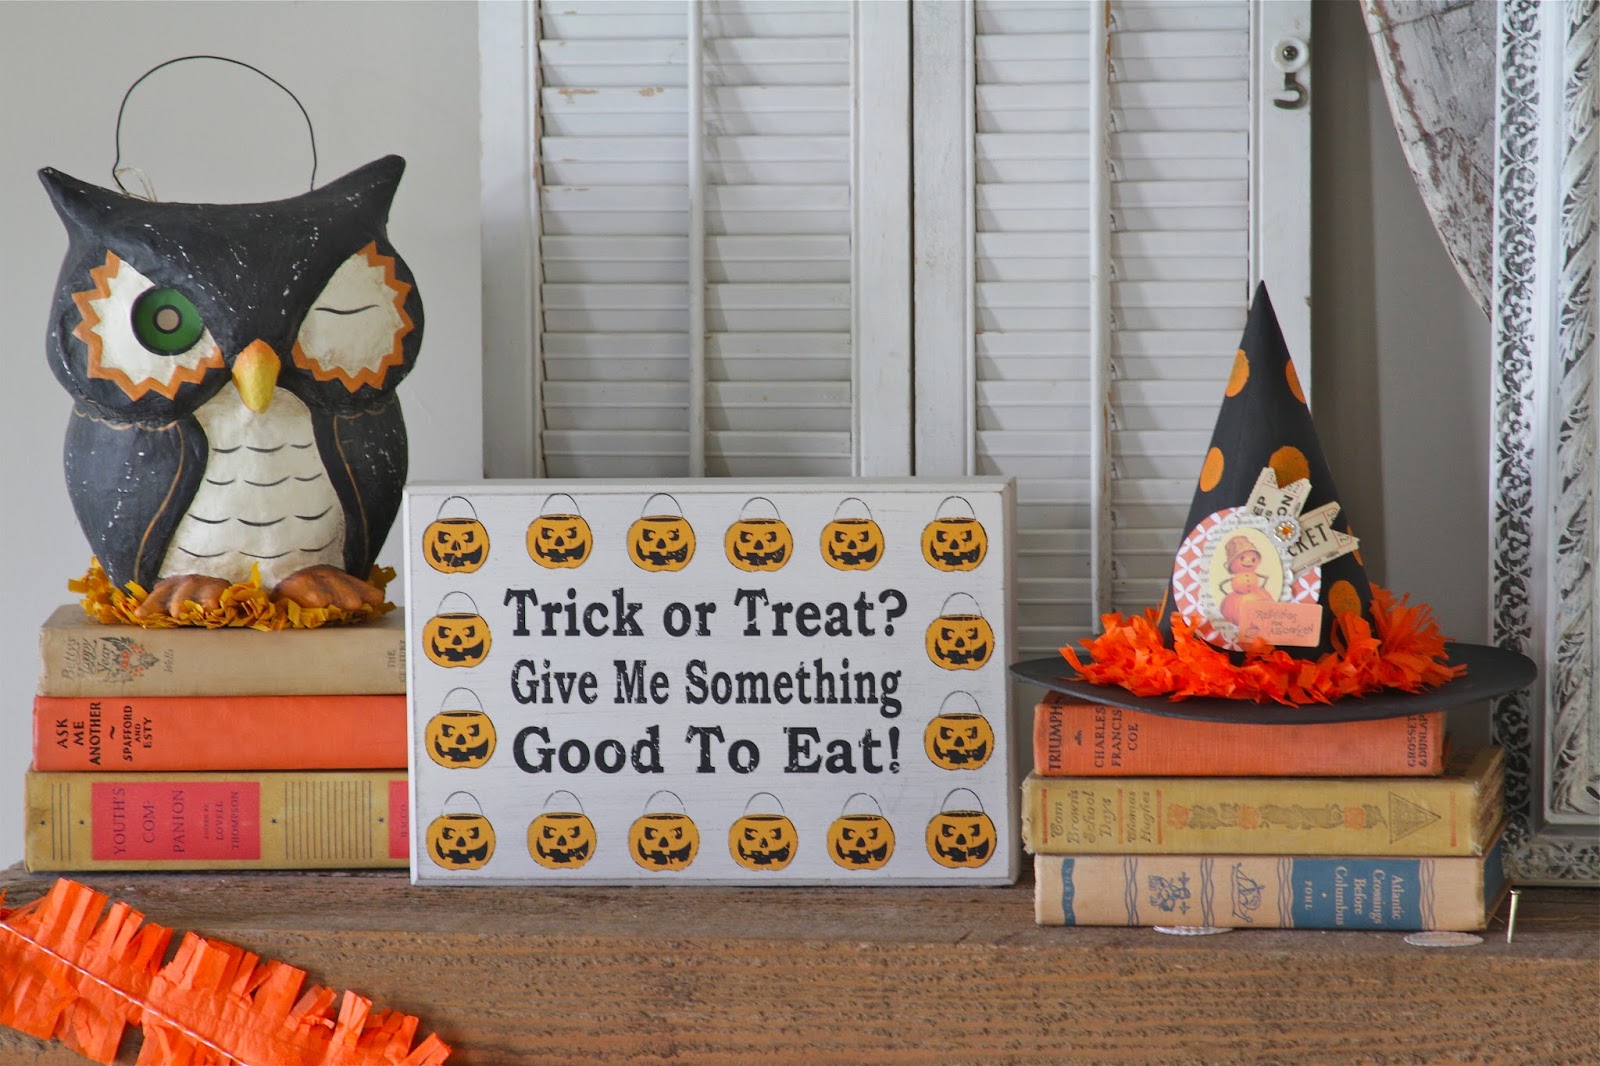
I used some of my old vintage books that I collect to add some height. The owl and the trick or treat sign came from good ol' TJ Maxx a few years back. I made the cut out pumpkin with my Cameo Silhouette. Here is the pattern.
I added the yarn pom poms to my banner. The shutters I've have, and they worked out to be a great place to hang some spooky spiders from. And lastly, I made the witches hat, and I have an easy tutorial coming soon, so you can make one too!


There you have it! Hope you feel inspired to add a little Halloween to your nest. Thanks for stopping by.
Until next time...
XO~Gretchen

Wednesday, September 24, 2014

Coffee Filter Halloween Wreath

Welcome, and I can't believe that it is officially Fall. The leaves are slowly starting to change in color, and there are pumpkins for sale everywhere. Time to start decorating your nest for the season. Today's project is a DIY wreath made out of coffee filters. I would only recommend putting this wreath on a front door that has a covered porch area over it. This wreath would also be lovely indoors too! You can even hang it from an open frame.
Here are the supplies that you will need for this project:
Coffee filters  I actually bought mine in bulk at Costco :)
Vintage book pages
Plastic spiders
Wire wreath
Glue gun
Glitter
Scrapbook paper
Twine
Washi tape
Circle punch
Scissors
The first step is to glue the coffee filters along the wire wreath.
I just crinkle the filters and then glue them to the wire using my glue gun. You eventually get a look like this...

Once I finished the layering of the coffee filters, I punched out the scalloped circles using my circle punch. I used vintage book paper, but you could also use scrapbook paper.
I then added some Miss Mustard Seed glass glitter. I recently purchased the glass glitter from Vintage Style and Designs. If you have never used glass glitter before, then you are missing out. It is extra sparkly, and makes any project extra special!
You simply glue around the edges, and then sprinkle the glitter. I always sprinkle my glitter over an extra piece of paper, that way I can just pour the extra glitter that doesn't stick back into the container. Waste not, want not.
Once you have glittered the edges, you can glue the spider to the paper, and then glue the paper to your wreath.
Next I created the triangle banner. I simply cut triangle shapes out of scrapbook paper and then glued them to twine. I attached them to the back of the wreath by tying them to the wire on the back.
Now time to decide what you want your wreath to say! I chose BOO, because I loved the design from my Silhouette Cameo. You can find the design here. Cutting something out by hand is another option, or looking for Halloween chipboard and clip art would work as well. I accented the cut out with some wahsi tape.
The final step was just adding some ribbon on the back so that I could hang it, and there you have it!


So, it's a start to getting our front porch transitioned to fall. I'll be adding some pumpkins and other spooky things the closer we get to Halloween. Hope you feel inspired to make this wreath. I think it will be a great addition to your nest this Fall.
Until next time....
XO~Gretchen